
Beneath the surface of your home lies a hidden gem just waiting to be transformed. Yes, we’re talking about that often neglected space known as the basement. From a dusty storage area to a modern living space, basement renovations have become increasingly popular in recent years.
However, before you dive headfirst into this exciting project, it’s important to understand the challenges that lie beneath. Moisture infiltration, limited light, ventilation woes – oh my! But fear not, intrepid renovators. You’ll be learning some of the biggest hurdles you may encounter during your basement renovation journey and provide expert tips on how to tackle them like a pro.
Building Code Compliance
This compliance, though is often so confusing, ensures the safety and structural integrity of the space, the levels of sustainability, as well as adherence to legal requirements. However, navigating building codes can be challenging and time-consuming. To make things easier, check out https://www.energieheld.de/blog/energie/nachhaltiger-kellerbau. One common challenge in meeting building code compliance is obtaining permits and approvals from local authorities. This process can involve submitting detailed plans, specifications, and documentation for review. It’s essential to carefully follow all submission guidelines to avoid delays or rejections. Working with a professional contractor who has experience in basement renovations can help you navigate these challenges effectively. They will have a strong understanding of local building codes and know how to design and execute projects that meet compliance standards.
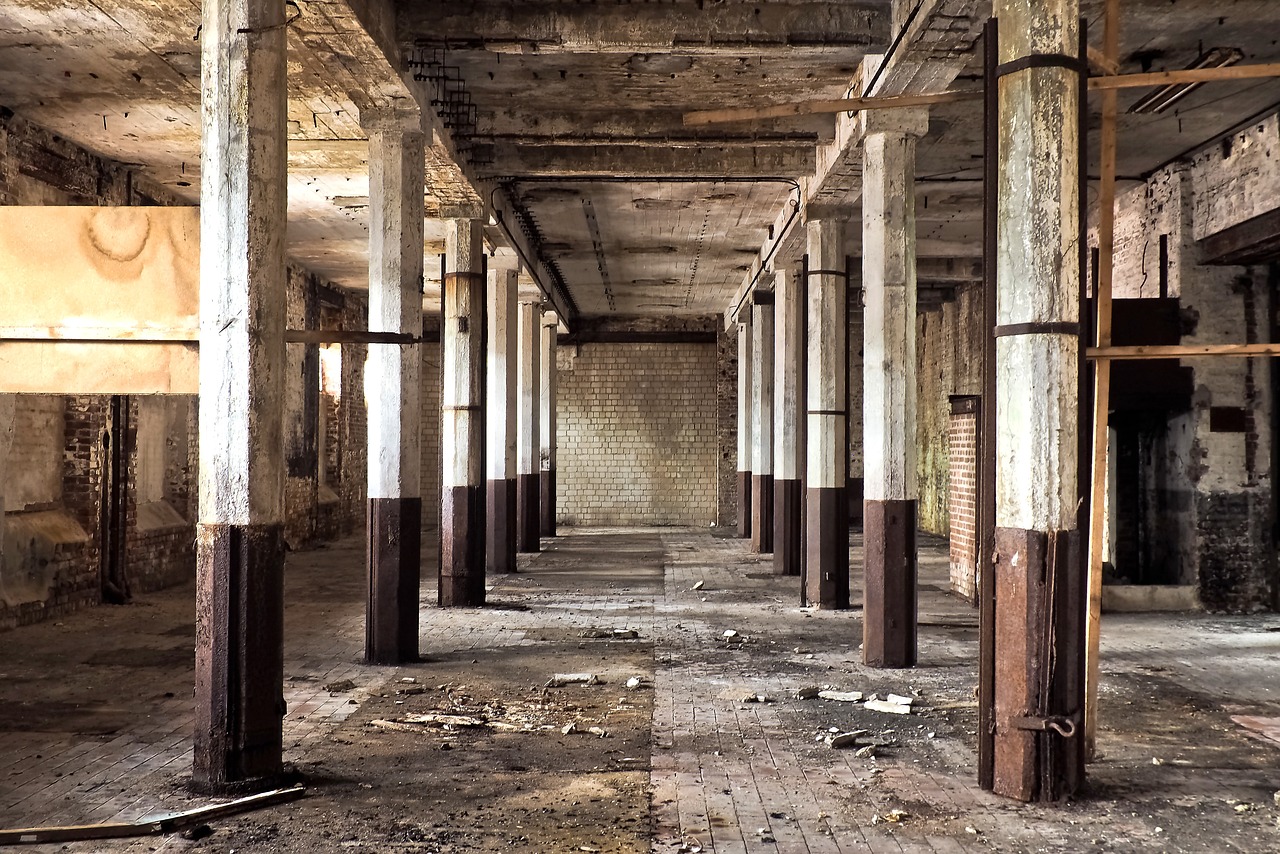
Moisture and Water Intrusion
 Moisture and water intrusion are perhaps the most common challenges faced when renovating a basement. After all, being below ground level makes basements more susceptible to dampness and leaks. The last thing you want is to invest time and money into creating a beautiful new space only to have it ruined by moisture-related issues. One of the first steps in tackling this challenge is identifying the source of the moisture. Is it coming from groundwater seepage, poor drainage, or leaky pipes? Once you’ve pinpointed the problem, take immediate action to address it. This may involve installing proper waterproofing measures such as sealants or membranes on walls and floors.
Low Ceilings and Limited Light
Basements are often characterized by lower ceiling heights compared to the rest of the house, which can make them feel cramped and confined. The lack of natural light in basements also poses a significant challenge. Without proper windows or access to sunlight, basements can appear gloomy and unwelcoming. This can be particularly problematic if you plan on using your basement as a living space or home office. To tackle these challenges, opt for lighter paint colors on your walls and ceiling to create an illusion of more space. Mirrors placed strategically can also help reflect what little natural light does enter the basement, making it seem brighter. Installing recessed lighting fixtures or track lighting can provide artificial illumination that mimics natural light.
Ventilation Challenges
 Proper ventilation is vital in any living space, and basement renovations often present unique challenges when it comes to achieving adequate airflow. With limited access to natural light and outdoor air sources, basements can quickly become stuffy and prone to poor air quality. One of the main challenges in basement renovations is creating effective ventilation systems that balance energy efficiency with proper airflow. Traditional windows may not be an option for basements located below ground level, making it necessary to explore alternative solutions such as window wells or egress windows.

 The exact ROI of any outdoor improvement on your property depends on many aspects including where you live. A 2017 survey by the American Institute of Architects (AID) shows that for the sixth consecutive year, outdoor living rooms have taken first place regarding growing consumer interest for specialized spaces. Outdoor room improvements can run the gamut from patio improvements and firepit additions to full-blown outdoor kitchens, and in-ground, hardscaped pools, and other water features.
 If you prefer to entertain family and friends but feel like you never have enough room in your kitchen to handle all the prep work or seating, add another outdoor kitchen! When designing your outdoor kitchen, you should use the same design principles that were used for your kitchen. They should all work effectively and efficiently and have ample space. With proper design and planning, your outdoor kitchen can mimic what your indoor kitchen can do and much more, along with the added benefit of fresh air, beautiful natural surroundings, and much more space for entertaining.
 Do you eat out often? Do you currently meet your friends for drinks at expensive restaurants or bars? Do you feel the need to go out all the time for your entertainment needs? Save money by creating the perfect “staycation” in your backyard, and you may be tempted to stop going out. Neglected backyards tend to cost more as time goes by. Weeds proliferate, unpruned trees and shrubs cause unwanted problems, old landscaping deteriorates, etc. By updating your outdoor space with new materials, you’ll save yourself the expense of these types of unforeseen problems and valuable time in the long run.
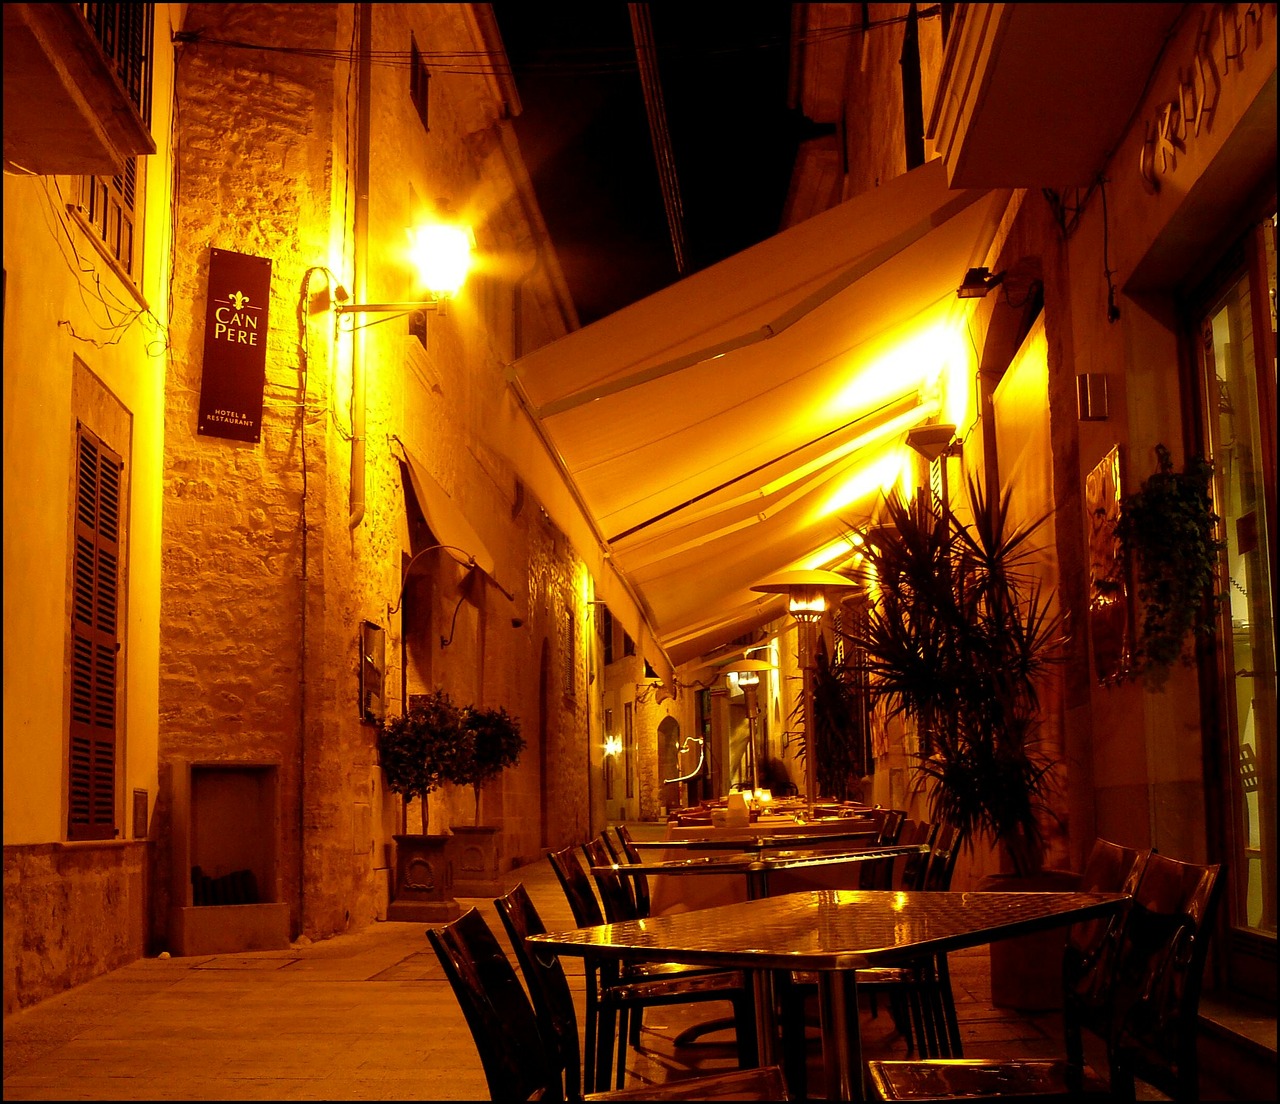
 The purpose of your lighting fixture will determine what material is best. We recommend using a copper outdoor lighting fixture if you want to enhance the exterior design and architectural details. The beautiful finish on this metal looks impressive when illuminated at night. This works exceptionally well if it’s installed near landscape features such as trees or flowers with copper components. If you’re also looking for security lighting, we recommend using a combination of materials. For example, have a steel fixture with a bronze or copper overlay. This will give you the best of both worlds.